
OpenID Connect Client with NodeJS Express
Posted on December 2, 2021 at 10:09 AM
Node.js and npm installed
Make sure that you have Node.js and npm installed in your system as they’ll be used in the tutorial. If you prefer yarn over npm you’ll have to change the npm commands into yarn ones.
Create an Express app
Initialize an Express app
Create the new app by following these steps:
- Create an empty directory for the app. Choosing a name for an app or service is always a difficult task – much more difficult than writing the code itself. Here we decided to help you a bit and already chose the name secured-app. We hope you’ll like it.
BASH
mkdir secured-app
cd secured-app
-
Init a node application with default settings.
BASH
npm init -y
The -y switch creates the app with some default properties, like name, description, etc. If you want to set your own values using the init wizard just omit this option. You can also change these values later manually directly in the package.json file.
You’ll notice that now there is a package.json file at the root of your project. This is the Node.js file that describes your project and its’ dependencies.
-
Install dependencies.
Obviously we’ll need Express as our dependency but let’s install all the different dependencies that will be needed in the course of this tutorial.
BASH
npm i express express-session ejs passport passport-curity express-oauth-jwt
npm i -D nodemon
So what exactly are these?
- express is the core of your application. The Express framework for Node.js enables you to easily create web applications and APIs.
- express-session adds support for sessions.
- ejs is a templating engine that you will use to create views for your app.
- passport is a great middleware that makes authentication and authorization in an express app painless. Passport uses different strategies to integrate with different protocols and identity providers.passport-curity is a passport strategy that integrates with the Curity Identity Server.
- express-oauth-jwt will only be needed if you decide to implement the part on securing endpoints with JWTs.
- nodemon is a handy utility that will make development much easier. The nodemon process will restart our server every time it detects changes in the source files, thus you won’t have to restart the server by yourself. As you’ll only need it for development you can install it with the -D switch. This dependency will not be needed in a production environment.
Let’s move on to creating the app itself.
- Create a server.js file in your root directory – this will be your main file responsible for running the app.
- Add the following to the server.js
JAVASCRIPT
const express = require(‘express’);
const app = express();
app.listen(3000, () => {
console.log(‘Server started and listening on port 3000’);
});
- Create a script that will run the application. In package.json file add this entry to the scripts map:
JAVASCRIPT
“dev”: “nodemon server.js”
- Finally, let’s start the app:
BASH
npm run dev
If everything went as planned, you should see in your console the log of your app: Server started and listening on port 3000. You can now open the browser and go to http://localhost:3000 to call your app. For now it will respond with a 404 response, telling you that Cannot GET /. That’s because we haven’t configured any controllers or views yet. But we can see that the our app is up and running. So let’s move on.
Add a Starting Page

Let’s create a static starting site that will contain the login button.
- First create the view file. All the views will be kept in the views folder. It’s a convention that can be changed by configuration, but let’s tick to that for now. Create this folder and add an index.ejs file.
- Put this content inside the index.ejs file:
HTML
<!DOCTYPE html>
<html>
<head>
<meta charset=”UTF-8″>
<title>Express OIDC Demo</title>
</head>
<body>
<h1>Welcome</h1>
<p>Let’s <a href=”/login”>Login with Curity</a></p>
</body>
</html>
- Set the templating engine in your app. In the server.js add a line somewhere above the app.listen call:
JAVASCRIPT
app.set(“view engine”, “ejs”);
- Add a controller displaying the main page.
Controllers in Express are just functions which accept the request and response object and send an appropriate response to the requester (a browser or an API client). In this tutorial the controllers will be fairly simple but to keep things nice and clean let’s create them in separate files. So first, create an index.js file that will be the controller for the main page. Put the following code in this file:
JAVASCRIPT
const express = require(‘express’);
const router = express.Router();
const handleIndex = (req, res) => {
res.render(‘index’, {});
}
router.get(‘/’, handleIndex);
module.exports = router;
The router is used here to let the controller know which functions should be tied to which paths and HTTP methods. By calling router.get(‘/’, handleIndex); you attach the path / and http method GET to the handleIndex function.
- Register the controller (router) in your express app. In the server.js file add these lines:
JAVASCRIPT
const indexController = require(‘./index’);
app.use(‘/’, indexController);
Note that when registering the controller in the app you must again provide a path. If you mount the controller on a path then all the paths used inside the controller will be relative to the path used to mount it. So if you call app.use(‘/example’, indexController); then the handleIndex function will be attached to GET /example not GET /.
- Try it out.
Thanks to using nodemon there’s no need to restart the server. Just head to http://localhost:3000 in your browser and you should see our beautiful starting page.
Add a User Page

After the user logs in they will be shown a page with their username displayed. Let’s add another view and controller.
- Create a file user.ejs in the views directory:
HTML
<!DOCTYPE html>
<html>
<head>
<meta charset=”UTF-8″>
<title>Express OIDC Demo</title>
</head>
<body>
<h1>Welcome</h1>
<p>
Hello <%= username %>! Welcome to the express demo. You logged in with Curity and authorized the
<%= client %> to access your resources.
</p>
</body>
</html>
Here you use the ejs markup. To print the value of the username variable you have to put it inside the tags <%= and %>. For demonstration purposes, the ID of the application that triggered the login will also be shown.
- Create the controller. Create another controller file -user.js and put this code inside:
JAVASCRIPT
const express = require(‘express’);
const router = express.Router();
const handleUserProfile = (req, res) => {
res.render(‘user’, {
username: req.user.profile.sub,
client: req.user.profile.audience
});
}
router.get(‘/’, handleUserProfile);
module.exports = router;
You need to pass values for the username and client variables to the template. Here you’ll use claims from the ID token obtained during login process. Later on you’ll also see how to configure the login process so that data in a different form is available here.
- Mount the controller in your app. Again add a line to the server.js file:
JAVASCRIPT
const userController = require(‘./user’);
app.use(‘/user’, userController);
- Almost ready.
You’ve just added a new controller with a view which is mounted on the /user path. But if you now go to http://localhost:3000/user you’ll see an error. That’s because no user have logged in yet! But, you’re all set to integrate your app with Curity Identity Server using passport.
Enable authentication and authorization with passport and OpenID Connect

Enabling authentication with passport library requires adding a few more lines of code to your app:
- Create a passport.js file. That’s where all the relevant passport configuration will be kept:
JAVASCRIPT
// Part 1, import dependencies
const express = require(‘express’);
const router = express.Router();
const passport = require(‘passport’);
const { Strategy, discoverAndCreateClient } = require(‘passport-curity’);
// Part 2, configure authentication endpoints
router.get(‘/login’, passport.authenticate(‘curity’));
router.get(‘/callback’, passport.authenticate(‘curity’, { failureRedirect: ‘/login’ }), (req, res) => {
res.redirect(‘/user’);
});
// Part 3, configuration of Passport
const getConfiguredPassport = async () => {
// Part 3a, discover Curity Server metadata and configure the OIDC client
const client = await discoverAndCreateClient({
issuerUrl: ‘https://idsvr.example.com/oauth/v2/oauth-anonymous’,
clientID: “demo-client”,
clientSecret: “Secr3t”,
redirectUris: [“http://localhost:3000/callback”]
});
// Part 3b, configure the passport strategy
const strategy = new Strategy({
client,
params: {
scope: “openid profile”
}
}, function(accessToken, refreshToken, profile, cb) {
return cb(null, { profile });
});
// Part 3c, tell passport to use the strategy
passport.use(strategy);
// Part 3d, tell passport how to serialize and deserialize user data
passport.serializeUser((user, done) => {
done(null, user);
});
passport.deserializeUser((user, done) => {
done(null, user);
});
return passport;
};
// Part 4, export objects
exports = module.exports;
exports.getConfiguredPassport = getConfiguredPassport;
exports.passportController = router;
That is a lot going on in one file… Let’s look a bit closer at what happens in each of the parts:
Part 1: Import dependencies
That’s the easy part – import all the dependencies that will be needed later on.
Part 2 : Configure authentication endpoints
As the authentication is done using the OIDC protocol and authorization code flow, you will need two endpoints to properly handle it. One that will initialize the process, and another one that will receive the code from the Curity Server and will exchange it for tokens. The endpoints are quite simple – all you have to do is tell the router that the passport middleware should be used on these paths. Passport will handle all the magic for you. You can pass different options to the passport authenticate method. In the callback endpoint e.g. you tell passport to forward the user back to /login, should the authorization process fail. Finally, the /callback endpoint also has a controller function. This is a regular Express controller method so anything you need can happen there. In this example, though you just redirect the user to their profile page.
Part 3 Configuration of Passport

All of the configurations of passport middleware are done in a single async method. The async keyword is used here so you can wait for the result of the method which creates the OIDC client. If you’re more of a Promise person and prefer its’ syntax that’s not a problem. The discoverAndCreateClient returns a Promise, so you can quite easily rewrite this part of the code.
Part 3a, discover Curity Server metadata and configure the OIDC client
First, you need an OIDC client. A client that will be able to request the Curity Identity Server. Provide the client with the proper configuration of your Curity Server and OAuth client data (client ID, secret, and redirect URI). The method creating this client uses the issuer URL to discover all the metadata that is needed to properly handle any OIDC flows. Thanks to that you don’t have to configure this manually – the issuerUrl is all that is needed.
Part 3b, configure the passport strategy
Once you have the client you can create the Curity passport strategy object. It takes at least three parameters: the client created in the previous step, a params map, and a verified method.
The params map is a map of parameters that will be sent with the initial authorization request to the Curity Server. One of the most popular parameters used here is the scope param – you can ask your users to grant you access to specific resources based on the different scopes. You can ask for any list of scopes, but as you’re using an OpenID Connect flow, you should at least ask for the OpenID scope. Other popular parameters that can be used here are e.g. prompt or nonce. Have a look at passport-curity documentation to check what parameters can be set in this map.
The verify method is a function that accepts four parameters: the access token, the refresh token, the user profile, and a callback. The access and refresh tokens are the tokens that you receive from Curity Server upon successful authentication and authorization. The profile is a map of all the claims that were present in the user’s ID token. The callback is a method that should eventually be called inside the verify method. The callback accepts an error object as it’s first parameter and a user object as the second.
Part 3c, tell passport to use the strategy
This tells the passport middleware to use the Curity strategy.
Part 3d, tell passport how to serialize and deserialize user data
Next, you have to tell the passport how to keep the user data in a session and how to retrieve this data from the session. In this tutorial, you just dump the user profile to the contents of the session cookie. This might not be the best practice in a production environment as you could end up with private user data in a cookie. You could use just the user ID in the serialization process, and then, when deserializing, read the data from a database based on the user ID from the cookie.
Part 4, export objects

Finally you export the relevant objects.
- Initialize passport in your app. As you’ve seen, preparing the passport Curity strategy is an asynchronous operation. This means that you’ll have to change the contents of the server.js a bit. Some of the configurations should be now enclosed in an async function, which is called in the end – hence the () at the very end:
JAVASCRIPT
(async () => {
const userController = require(‘./user’);
app.use(‘/user’, userController);
app.listen(3000, () => {
console.log(‘Server started and listening on port 3000’);
});
})();
Which parts of the configuration should be enclosed in this function? In Express the order in which middleware is applied to the request-response stack is important. Middleware registered earlier will be called first. You also have to remember that controllers are actually middleware that sends the response to the requester. Thus every controller which should be protected by passport or will use the session data made available by passport should be registered inside this asynchronous function.
- Next add session support to the app. Still in the server.js file, this can be done outside of the async function:
JAVASCRIPT
const expressSession = require(‘express-session’);
const session = {
secret: “someSecret”,
cookie: {},
resave: false,
saveUninitialized: false
};
app.use(expressSession(session));
- Finally register the passport middleware and the router responsible for handling passport endpoints. Again in server.js, add the following at the beginning of the async method:
JAVASCRIPT
const { getConfiguredPassport, passportController } = require(‘./passport’);
(async () => {
const passport = await getConfiguredPassport();
app.use(passport.initialize());
app.use(passport.session());
app.use(‘/’, passportController);
…
})();
- Your server.js file should now look like this:
JAVASCRIPT
const express = require(‘express’);
const app = express();
app.set(“view engine”, “ejs”);
const expressSession = require(‘express-session’);
const session = {
secret: “someSecret”,
cookie: {},
resave: false,
saveUninitialized: false
};
app.use(expressSession(session));
const indexController = require(‘./index’);
app.use(‘/’, indexController);
const { getConfiguredPassport, passportController } = require(‘./passport’);
(async () => {
const passport = await getConfiguredPassport();
app.use(passport.initialize());
app.use(passport.session());
app.use(‘/’, passportController);
const userController = require(‘./user’);
app.use(‘/user’, userController);
app.listen(3000, () => {
console.log(‘Server started and listening on port 3000’);
});
})();
Let’s try it out! Go to http://localhost:3000 and click the Login with Curity! link. You should be redirected to your Curity Identity Server and then back to your application’s profile page. Great success – you’ve just enabled your users to log in to your application using the Curity Identity Server!
Secure endpoints with JWTs

You’ve added an authentication and authorization mechanism to your Express app. It’s now easy to secure any page in your app – just check whether the user field is present in a req object. If not, then redirect the user to login (or show an error, etc.). This works if you create an application with a frontend, e.g. a web page because a session is needed to keep track of the logged-in user. But what if you want to expose an API in your app? So, In such a case, you cannot rely on session mechanisms.
In an API, when you want to secure an endpoint, one of the solutions is to use an OAuth bearer token in JSON format – a JSON Web Token, or “jot”. between this part, you’ll add a middleware that can secure your endpoints with such tokens.
Have a look at this article if JWTs are a new thing for you.
Note on Opaque tokens
It is a common practice for an Authorization Server to issue opaque access tokens instead of JWTs. As a matter of fact, this is also the default behavior of the Curity Identity Server. Using opaque tokens in the outside world is more secure as no data can be read from the token (as is the case with JWTs). However, it’s more convenient for an API to use JWTs as access tokens – you’ll usually want your service to have access to all the data carried in a JWT. That’s why at Curity we recommend using the Phantom token approach where an API gateway is responsible for introspecting the opaque token and exchanging it for a JWT, which is then sent together with the request to the services handling the API request.
In this tutorial, we assume that you either use JWTs as access tokens for your API or use the Phantom token approach, so that the microservice always deals with a JWT, never an opaque token.
The implementation
- Create a secured.js file. This will be the controller containing secured endpoints. Add the following code into the file to configure the JFK service, which is needed to read the keys used for verification of JWTs.
JAVASCRIPT
const { getSimpleJwksService, secure } = require(‘express-oauth-jwt’);
const jwksService = getSimpleJwksService(“https://idsvr.example.com/oauth/v2/oauth-anonymous/jwks”);
Provide the service with the URL of the JWKS endpoint of your Curity Identity Server instance.
- Create a new endpoint and add the middleware to that endpoint. Add this to the secured.js file:
JAVASCRIPT
const express = require(‘express’);
const router = express.Router();
const getSecuredWithAnyToken = (req, res) => {
res.status(200).json({ data: “Some data from secured endpoint.”, user: req.claims.sub });
}
router.get(‘/token’, secure(jwksService), getSecuredWithAnyToken);
module.exports = router;
The secure middleware not only verifies the token but also decodes it and sets all the claims in the request object, in a claims field. You can then access these claims in any other middleware which is further in the chain, or in the controllers.
- Mount the endpoint in your application. In the server.js add the following:
JAVASCRIPT
const securedController = require(‘./secured’);
app.use(‘/secure’, securedController);
As this code needs neither session support nor passport, it can be added anywhere before the async function is called (or inside of it).
- Test the solution
Make a curl request to the secured endpoint:
BASH
curl -i http://localhost:3000/secure/token
You should see a 401 response, as you haven’t sent a token. You can check the details of the error in the WWW-Authenticate header. Currently, it has the value Bearer. This means that this endpoint requires an Authorization header with a bearer token inside.
To obtain a valid JWT you can use the online tool OAuth.tools which is a powerful tool to explore OAuth and OpenID Connect. You can easily add the configuration of your Curity Identity Server and use any flow to generate a valid access token. If you’re not sure how to create a JWT token using OAuth flows have a look at the
Once you have the token, make a request like this:
BASH
curl -i http://localhost:3000/secure/token -H “Authorization: Bearer eyJ0e…aOCg”
This time you should see the 200 responses and some JSON data.
Adding more security to the endpoint
The secure middleware provided by the express-OAuth-jwt library has some more functionality. It can not only verify the signature and expiration time of the token but also check scopes or the presence of claims. Have a look at the documentation to check all the available options.
If you want to verify whether the token has some expected scopes you can do it by adding the following.
- Add scope option when securing an endpoint. In the secured.js file add another endpoint:
JAVASCRIPT
const getSecuredWithScope = (req, res) => {
res.status(200).json({ data: “Some data from secured endpoint.”, user: req.claims.sub, scope: req.claims.scope });
}
router.get(‘/scope’, secure(jwksService, { scope: [ “someScope” ] }), getSecuredWithScope);
- Invoke the new endpoint with the token you used before:
BASH
curl -i http://localhost:3000/secure/scope -H “Authorization: Bearer eyJ0e…aOCg”
You should now see a 403 response unless your token already contained the someScope scope token. Again the WWW-Authenticate header gives us more information on what exactly happened. From the error and error_description values, you can learn that the token is missing some required scopes.
Conclusion
Thanks to Passport middleware adding authentication and authorization to an Express app and integrating with the Curity Identity Server is an easy task you could also see how to secure any endpoint in an application with a signed JWT, with the help of the express-OAuth-jwt library.
Related Posts
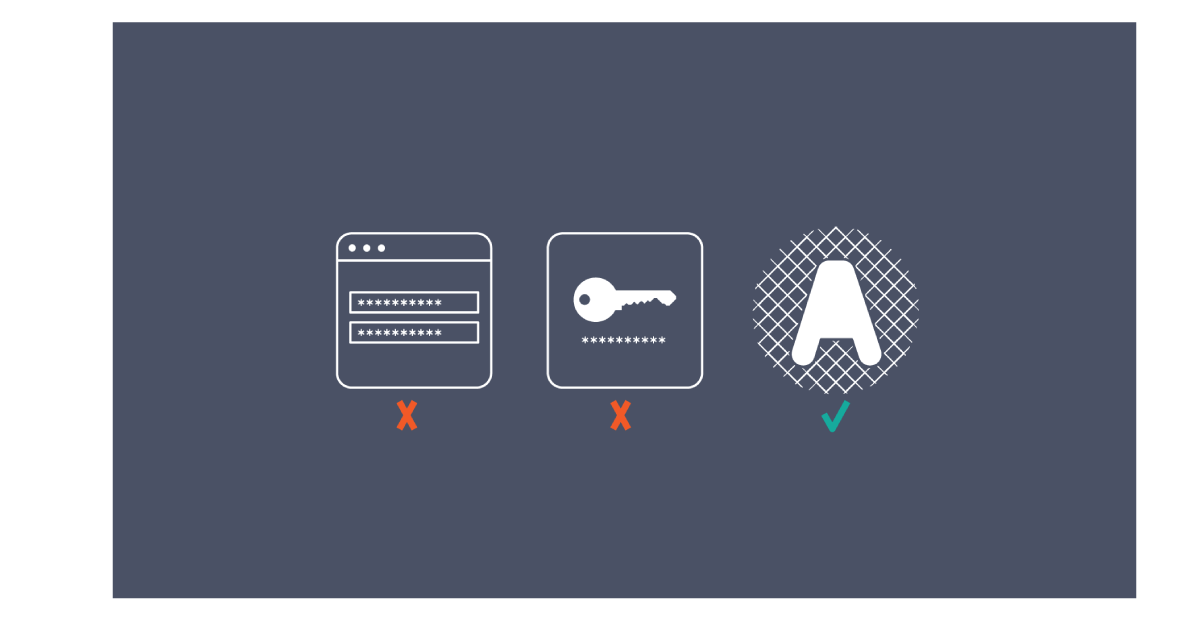
The Difference Between HTTP Auth, API Keys, and OAuth
When designing systems that enable secure authentication and authorization for API access, …
Continue reading "The Difference Between HTTP Auth, API Keys, and OAuth"

Understanding Cookies and Implementing them in Node.js
Websites usually store a small amount of data on the browsers. There …
Continue reading "Understanding Cookies and Implementing them in Node.js"
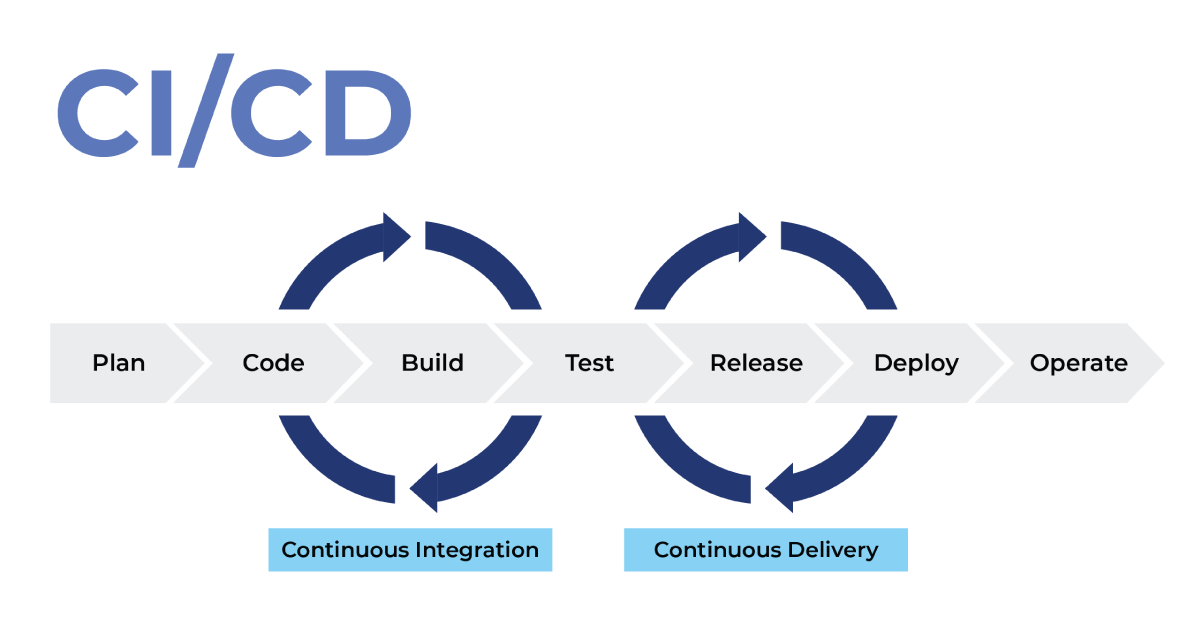
CI/CD pipeline to deploy angular on AWS with Gitlab Runner.
What are CI and CD? Continuous Integration (CI) is a development practice …
Continue reading "CI/CD pipeline to deploy angular on AWS with Gitlab Runner."
We could talk tech all day. But we’d like to do things too,
like everything we’ve been promising out here.