
Understanding and Implementing OAuth2 In Node.js
Posted on December 4, 2021 at 08:02 AM

OAuth 2.0 is the most widely used and accepted industry-standard protocol for authorization. As a protocol, it provides a bunch of tools, patterns, and best practices to help developers with the arduous task of accomplishing authorization flows for all sorts of applications, such as web, mobile, and embedded.
So, What About OAuth2?
There are a lot of misconceptions and over-complications when ,it comes to understanding what OAuth is really about.
OAuth2 has a couple of predefined flows that you can use on your projects; however, some of them will not apply to your situation.
Here, we’ll demonstrate a scenario in which the interested party who owns the web application in development (in this case, you) makes use of a third-party system to infer authorization within the application.
Among the third-party systems, you may consider the big players, such as Google, Facebook, or, in our case, GitHub.
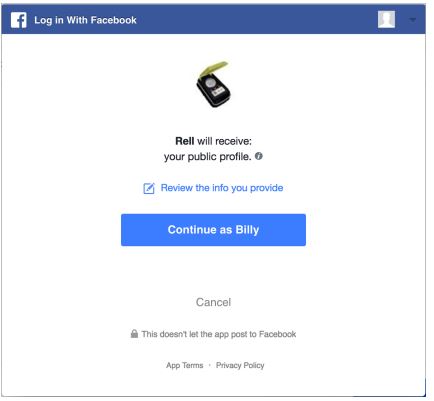
Authorization upon Facebook’s systems.
Typically, OAuth2’s most commonly used flow is divided into three main steps:
-
Your application pops up a new window for the third-party authorization app, asking the user (who must have an account and be logged in on the system) to grant permission for your application and then be able to take actions on his/her behalf.
Once properly authenticated and authorized, the third-party app acknowledges the permission and redirects the user back to your app via a pre-configured URL.
Your application exposes an endpoint for such callback operations and hits the third-party provider API to ask for an access token based on the response code returned by the previous redirect process.
First, we make use of the useState hook to create two state objects: a Boolean to detect whether the user is logged in and a user object to hold GitHub’s response. Both with the respective setter methods.
Then, we set up a use effect hook to load only once when the whole component page is loaded and check for the user’s details based on the access token provided via query param. If the param is present, let’s set both the user and logged-in state values so that the logic to render the component will consider them. Otherwise, we simply present the Sign-up component.
The render function takes care of displaying the proper component based on the current authorization state. We won’t go into detail about how React components work here, but feel free to change them with as much of the cool stuff from Bootstrap as you want.
Note that we’re providing GitHub with the URL for the client_id on the button. Make sure to change it with yours.
If you don’t want to delegate the process of keeping users’ login information and, instead, want to handle the authorization on your own, you can create an OAuth2 server.
This is what many companies do today due to the number of customizations required to meet their needs.
Let’s look at this scenario more closely and see how Node.js deals with it.
Environment Setup
For this article, we’ll be using Node.js, and Yarn as the default package manager. Node is on version v12.21.0 to be specific. However, most of the versions higher than 10 should work just fine.
Make sure to run each of the official installation steps to have them set up in case you still don’t.
For this tutorial, we’ll create two different applications: one for the client (in React) and another for the server capabilities.
It’s important to know that this far, although you can perfectly build your OAuth2 server from scratch using frameworks, such as the node-oauth2-server, we’ll make use of GitHub’s capabilities for the sake of simplicity.
There are too many details around the ability to set up an OAuth2 server properly that we won’t cover for now.
However, in case you’d like to adventure yourself into it, the server project we’ll create will be more than adequate for the role of OAuth2’s server host.
GitHub App Config
For this tutorial, we’ll make use of the powerful GitHub OAuth2 API. GitHub allows you to create an application under your account and provides you with some OAuth2 client credentials to use in other applications.
This way, you can easily allow users of your application to log in via their GitHub accounts.
So, let’s create a new application by clicking this link. Make sure to fill in all the fields, as shown in the image below:
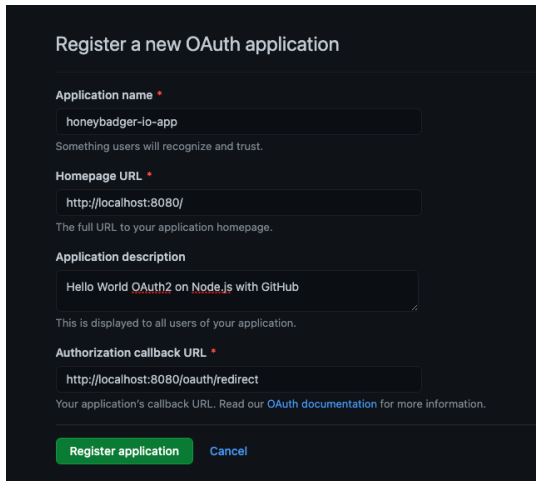
Registering a new OAuth application.
The Authorization callback URL is the most important field because it demarcates where GitHub should redirect the user once the authorization process is finished.
Note that you can enter any URI you prefer. Click the Register application button, and you may see a subsequent screen showing the Client ID and your Client secrets.

Client ID and secrets.
Once you get there, you need to click the button to generate a new client secret. Make sure to copy/paste it to a safe place before leaving this screen since you won’t be able to see it again in the future.
The Server Project
Let’s get back to project creation. Pick up a folder of your choice and run the following command:
mkdir oauth2-node-server
cd oauth2-node-server
npm init
Again, leave all the options as they’re presented to you until the end. Then, run the following command to install the required NPM dependencies:
npm install axios express cors
Axios will be used to make HTTP request calls to the GitHub OAuth2 servers. Express will be our version of the server, and cors is just used to avoid conflicts with the browser’s Same-Origin policies.
The code for the server is very simple and can be found in the following code. Make sure to add it to a file named index.js:
const express = require(“express”);
const axios = require(“axios”);
var cors = require(“cors”);
const CLIENT_ID = “<YOUR GITHUB CLIENT ID>”;
const CLIENT_SECRET = “<YOUR GITHUB CLIENT SECRET>”;
const GITHUB_URL = “https://github.com/login/oauth/access_token”;
const app = express();
app.use(cors({ credentials: true, origin: true }));
< app.get(“/oauth/redirect”, (req, res) => {
axios({
method: “POST”,
url: `${GITHUB_URL}?client_id=${CLIENT_ID}&client_secret=${CLIENT_SECRET}&code=${req.query.code}`,
headers: {
Accept: “application/json”,
},
}).then((response) => {
res.redirect(
`http://localhost:3000?access_token=${response.data.access_token}`
);
});
});
const PORT = 8080;
app.listen(PORT, () => {
console.log(`Listening at port ${PORT}`);
});
What we’re doing on this server is simply proxying requests from the GitHub platform to the /OAuth/redirect path once the authorization steps are concluded.
When it’s done, we need to make sure to call it again to retrieve a valid access token. To do this, GitHub needs to know who’s calling to check whether the caller has such access.
The only way GitHub can know this is via the client id and client secret provided by your GitHub application, so they may be passed as parameters to the request.
Also, note that we’re sending a query param called code that GitHub provides when calling the callback URL as a second security check of its own. Otherwise, the request would fail.
If the second GitHub’s call is successful, then we may redirect the response and all of its content to the React client application listening to port 3000.
Before heading to the next section, make sure everything’s working fine by running the following command:
node index.js
which may, in turn, produce the output shown below:
➜ Listening at port 8080
The Client Project
The client project will get some help from React and Bootstrap to make things aesthetically cleaner.
Leave the current server folder and run the following command to create the client project:
npx create-react-app oauth2-node-app
To make things simpler for the client, we’re also making use of the create-react-app tool. After you run it, make sure to leave all the options as defaults until the end.
Then, run the following command to add the required Node dependencies:
yarn add react-bootstrap Axios
Make sure to add this CSS import in your index.js file to inject Bootstrap’s styles into the React project:
import ‘bootstrap/dist/css/bootstrap.min.css’;
Great! Without further ado, let’s move on and substitute your App.js file content with the following:
import Button from “react-bootstrap/Button”;
import CardDeck from “react-bootstrap/CardDeck”;
import Card from “react-bootstrap/Card”;
import { useEffect, useState } from “react”;
import axios from “axios”;
import “./App.css”;
function App() {
const [loggedIn, setLoggedIn] = useState(false);
const [user, setUser] = useState(null);
useEffect(() => {
const token = new URLSearchParams(window.location.search).get(
“access_token”
);
axios
.get(“http://localhost:8010/proxy/user”, {
headers: {
Authorization: “token “ + token,
},
})
.then((res) => {
setUser(res.data);
setLoggedIn(true);
})
.catch((error) => {
console.log(“error “ + error);
});
}, []);
return (
<div className=“App text-center container-fluid”>
{!loggedIn ? (
<>
<img
className=“mb-4”
src=“https://github.githubassets.com/images/modules/logos_page/GitHub-Mark.png”
width=“150”
></img>
<h1 className=“h3 mb-3 font-weight-normal”>Sign in with GitHub</h1>
<Button
type=“primary”
className=“btn”
size=“lg”
href=“https://github.com/login/oauth/authorize?client_id=8f672e53bc6b92be977d&redirect_uri=http://localhost:8080/oauth/redirect”
>
Sign in
</Button>
</>
) : (
<>
<h1>Welcome!</h1>
<p>
This is a simple integration between OAuth2 on GitHub with Node.js
</p>
<CardDeck>
{[…Array(3)].map((e, i) => (
<Card style={{ maxWidth: “25%”, margin: “auto” }}>
<Card.Img variant=“top” src={user.avatar_url} />
<Card.Body>
<Card.Title>{user.name}</Card.Title>
<Card.Text>{user.bio}</Card.Text>
<Button
variant=“primary”
target=“_blank”
href={user.html_url}
>
GitHub Profile
</Button>
</Card.Body>
</Card>
))}
</CardDeck>
</>
)}
</div>
);
}
export default App;
Since we’re using the latest version of React (17.0.1), we’ll make sure to use only React hooks for the whole implementation.
Let’s break it down a bit for a better understanding:
You may also have noticed that there’s a third localhost URL on this code listing: http://localhost:8010/proxy/user. The reason is that if we try to access GitHub directly from the UI, we will face some cors-related issues.
The easiest way to deal with this is by creating a local proxy to handle the cors domain conversions for us. The local-cors-proxy NPM module is the perfect choice for this task.
To install it globally, simply run the following command:
npm install -g local-cors-proxy
Then, on the same terminal window, run another command to start it:
lcp –proxyUrl https://api.github.com/
You may see the following output stating that everything went well:
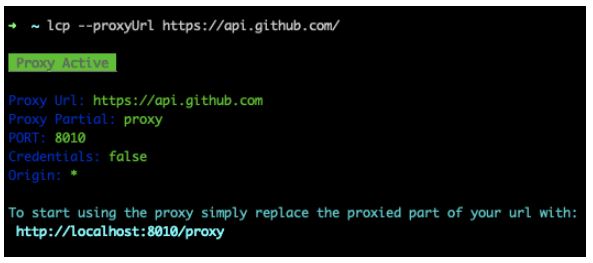
Starting up the cors proxy server.
It gives you a port at localhost (usually at 8010) to proxy to that specific URL.
Adding Some Style
We also need to add some styling before proceeding to the tests. Since we already have an index.css file with some CSS styles, let’s switch its content with the following:
html,
body {
height: 100%;
}
body {
display: -ms-flexbox;
display: -webkit-box;
display: flex;
-ms-flex-align: center;
-ms-flex-pack: center;
-webkit-box-align: center;
align-items: center;
-webkit-box-pack: center;
justify-content: center;
padding-top: 40px;
padding-bottom: 40px;
background-color: #f5f5f5;
}
div#root {
width: 80%;
}
Testing
To test the client implementation, you may run the following command in the client’s root folder:
npm start
Look for errors in the logs and wait until React loads the application on your web browser.
You may see the following screen with the Sign in button. Before clicking it, make sure to have both the server app and the proxy up.
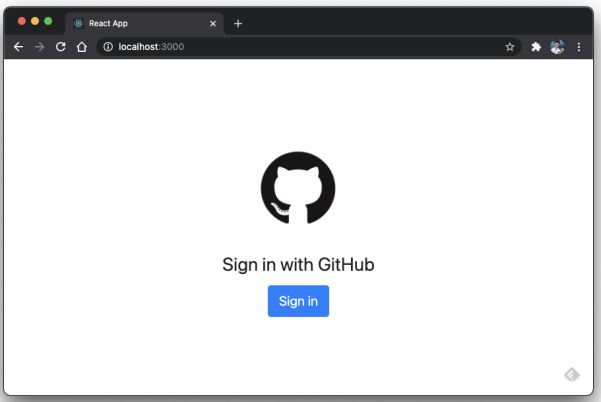
Sign in with GitHub.
After clicking the Sign in button, you’ll be redirected to the GitHub authorization page, as shown in the image below.
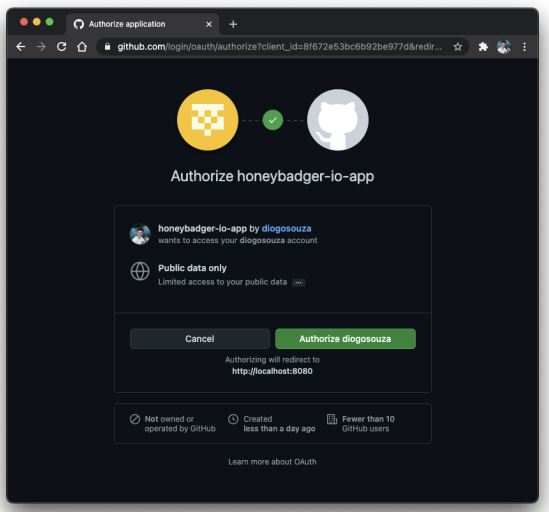
GitHub authorization page.
In case you’re not properly logged in, GitHub will take care of the whole authentication flow by itself. It’s one of the great benefits of this approach; you can delegate user authentication.
Click on the Authorize button, and GitHub will also take care of the redirecting process after it’s finished. In the end, you may see the following screen:
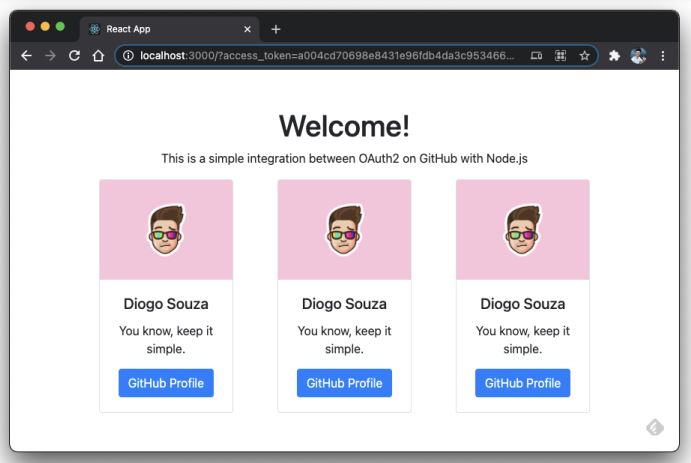
Welcome page with GitHub user information.
Another test that you can do right after is trying to access the root URI once again and click the Sign in button. You may see that the login process goes smoothly without an authorization page because, once the authorization has been done, its state persists until you revoke them.Wrapping Up
It’s not uncommon to hear from many beginner devs that OAuth2 is super complicated and too difficult for them to handle. The protocol itself is indeed large; however, you don’t have to dig into it all at once.
Many parts of the protocol aren’t commonly used. Start simple and then upgrade in small but concise chunks
Related Posts

7 must-have skills and cost of hiring Mongo Db developer!
Introduction MongoDB is a document-oriented database. It was developed by 10gen and …
Continue reading "7 must-have skills and cost of hiring Mongo Db developer!"
What all should a MEAN stack developer be familiar with?
Introduction Without question, Javascript has taken the top spot in both front-end …
Continue reading "What all should a MEAN stack developer be familiar with?"
7 Must-have skills for Joget Developers!
Introduction Have you heard of the phrase—”when the coding gets tough, the …
We could talk tech all day. But we’d like to do things too,
like everything we’ve been promising out here.